Hardware products built from Google, Panasonic, and Unilever follow the same fundamental stages. This guide shows first-time founders exactly how to build a hardware product from scratch using that same structured process in 2026, that take you from your first idea to manufacturing to a successful market launch. Most first-time founders who try to figure out how to build a hardware product from scratch never ship. They stall, overspend, or build something nobody wants. Building a hardware product from scratch takes 18 to 36 months. Each stage helps you in turning complexity into clarity and moves you forward in the right direction.
You may be sitting on an idea that feels valuable, practical, and ready for the market. It solves a real problem you have observed repeatedly. Yet when you think about building it, the process feels overwhelming. There are too many unknowns, too many moving parts, and too many examples of products that never made it to market.
“Ideas need direction to turn into real, scalable products.”
- Vyasateja Rao, Co-founder, Analogy Design
Time passes while the idea remains in your head instead of becoming a real product. You know the opportunity exists, yet the path forward feels unclear. This gap between idea and execution is where most hardware founders lose momentum. Others move ahead, launch products, and scale, while you are still trying to understand the process.
This hardware product guide brings structure to that process. It gives you a clear, step by step roadmap to move from idea to a manufacturable product. Each stage focuses on what matters, reduces confusion, and helps you make better decisions.
By the end, you will understand how to approach hardware product development with clarity, confidence, and a plan that works in the real world.
What This Hardware Product Guide Will Help You Achieve
This guide walks you through the full hardware product development journey. From validating your idea to preparing for manufacturing, every stage is broken into simple, actionable steps. You will understand what matters at each phase and where most hardware founders lose time and money.
As you move forward, you will start seeing your idea differently.
Why Most Ideas Fail Before They Begin
Many hardware products fail at the earliest stage. The reason is simple. Hardware founders fall in love with their idea before understanding the problem deeply. That emotional attachment leads to building something people never truly needed.
It feels exciting to jump straight into design and prototyping. Sketches, features, and concepts create a sense of progress. Yet without validation, that progress becomes an illusion. Time and money start flowing into something that lacks real demand. Users behave differently than expected. What seems obvious in your mind may feel irrelevant to them. Their priorities, habits, and willingness to pay shape the success of your hardware product.
Understanding this early creates a huge advantage. It allows you to focus on building something people genuinely want instead of something that only sounds good in theory.

Hardware Vs Software: Why Hardware Is Harder
Building your first hardware product feels like standing at the base of Everest. The path ahead looks impossible. Software are much easier to make. Most hardware founders either never start or burn through their budget making preventable mistakes.
Here's the truth: “Hardware is hard, but it's not mysterious.” Every successful hardware product follows the same fundamental stages. Skip one, and your product dies. Execute them right, and you ship.
This guide walks you through the complete hardware product development process, from validating your idea to shipping at scale. No fluff. Just the hardware product roadmap that works in real life.
Stage 1: Validate Your Product Idea Early
Most hardware products fail before they ever reach a customer. The reason? Founders fall in love with their solution before proving the problem exists. Start with market validation, not hardware product development. Talk to 50 potential customers. Ask about their current solutions, pain points, and willingness to pay. Document everything.
Find out if you need to patent your idea. Here’s a step by step guide for patenting your product idea. To register a patent in the US, follow this link. To register a patent in India, follow this link. For any other country, search how to register a patent in “your country name”.
Validation gives your idea a strong foundation. It helps you confirm whether people care about the problem and whether they are willing to pay for a solution. This stage focuses on learning, observing, and refining your assumptions. Start by speaking with real users. Aim for at least fifty meaningful conversations. Ask about their current behavior, challenges, and expectations. Listen carefully to patterns instead of isolated opinions.
Create a simple landing page that explains your product clearly. Share the value, highlight the problem, and include a clear call to action. Track how many people sign up or show interest. That signal reflects real demand.
Key Validation Questions
Below are questions that unlock real user truth:
- How do you currently solve this problem?
- What frustrates you the most about this solution?
- What would make you switch to a new solution?
- How much would you pay for this?
- When would you ideally want this problem solved?
These questions open honest conversations. They help you understand behavior instead of assumptions. Patterns begin to emerge quickly when you speak with enough users. Each answer adds clarity. Over time, your idea evolves into something sharper and more relevant.
Actionable Tip
Build a simple landing page describing your product. Drive traffic through ads or social media. Track sign-ups, not just page views. Real demand shows up in email addresses and genuine interest in your new product. You can launch a crowdfunding campaign on Kickstarter.
Only move forward if you can prove demand exists. No exceptions.
For inspiration, you can check out the hardware products category on Kickstarter.
The iDiya wellness device began with a clear, unmet user need in personal health monitoring. Before a single component was chosen, the team at Analogy Design validated the problem with real users, ensuring the product addressed a genuine gap. That early clarity shaped every design and engineering decision that followed.
Stage 2: Define Your Hardware Product Strategy
Strategy kills more hardware products than bad engineering. Define exactly what you're building, for whom, and why they'll buy it. This stage decides the direction of your entire product journey. A clear strategy simplifies decisions, while a weak strategy creates confusion across design, engineering, and manufacturing. Every great hardware product starts with a sharp focus on a specific user and a specific problem. That focus acts like a filter for every choice that follows.
Many hardware founders try to build too much too early. The intention feels right since they want to deliver maximum value. Yet complexity increases cost, delays timelines, and weakens the core experience. Simplicity creates speed, clarity, and stronger product market fit.
A strong hardware product strategy gives you control. It turns your idea into a structured plan. It aligns your vision with real user needs and business goals. This alignment builds confidence as you move into deeper stages like design and engineering.
Feeling Lost Deciding What To Build & Who Is It For?
An idea without structure feels exciting but unstable. It shifts based on new thoughts, opinions, and trends. This creates inconsistency, which slows down execution. Structure brings stability and direction to your hardware product.
Clarity becomes the biggest struggle right after validation. The idea feels exciting, users show interest, and momentum starts building. Yet a new question appears almost instantly. What exactly should you build first? That question creates friction because every feature feels important in the beginning.
A strong strategy comes from clarity, simplicity, and prioritization. Instead of adding more, focus on refining what truly matters. This creates a product that feels purposeful and effective.
Actionable Tip
Start by defining your target user clearly. Go beyond basic demographics. Understand their behavior, habits, and daily challenges. Think about where they spend time, how they make decisions, and what influences their choices.
Next, define the core problem in one simple sentence. This becomes your anchor. Every feature, design choice, and engineering decision should connect back to this problem. When the problem stays clear, the hardware product stays focused.
Then shape your product vision. Imagine where your hardware product stands after eighteen months. Think about user adoption, brand perception, and overall impact. This vision guides long term decisions while your early version stays simple.
Write a one-page hardware product brief covering:
- Target customer: Demographics, behaviors, current solutions
- Core problem: The specific pain point you're solving
- Product vision: What success looks like in 18 months
- Key features: The 3-5 features that matter most
- Success metrics: Revenue, units sold, customer satisfaction
Keep it simple. Complex hardware products die in development. Your first version should solve one problem extremely well, not ten problems adequately.

Designing an ergonomic toothbrush for Pepsodent required a sharp strategy from the outset: A clearly defined user, a specific usability problem, and a price point that fit both the brand and the market. That single-page product brief made every downstream design decision faster and more aligned.
Pricing Decisions Shape Your Entire Product
Pricing plays a powerful role in hardware development. It influences materials, components, manufacturing processes, and even packaging. Setting your target price early creates boundaries that guide smarter decisions. Think about what your target customer feels comfortable paying. Align that with your product value and positioning. A premium product requires different design and material choices compared to a budget friendly option.
Break down your target price into cost components. This includes manufacturing, logistics, marketing, and margins. Understanding this structure helps you design within realistic constraints. Pricing also affects perception. Users associate price with quality, trust, and experience. A well aligned price strengthens your product positioning and supports your brand story.
At this stage, your idea transforms into a clear product direction. You move from uncertainty to structured thinking. That clarity prepares you for the next step, where your strategy turns into detailed product requirements.
Stage 3: Define Product Requirements (PRD)
In stage 3, you must prepare your product requirement document (PRD). A well structured PRD keeps everything clear and actionable. The document acts as a single source of truth for your entire team. Every function, feature, and limitation gets documented in one place. Features sound simple at a high level. Yet each feature needs clear definition before development begins. Vague descriptions create confusion during engineering and testing. Break each feature into specific requirements. Define how it works, how users interact with it, and what output it delivers. This level of detail removes guesswork.
Do You Feel Confused Turning Ideas Into Clear Requirements?
Excitement builds after defining your strategy. The idea feels clearer, the direction feels stronger, and the next step seems obvious. Then a new challenge appears. How do you translate this idea into something your team can actually build. This is where most hardware founders feel stuck again.
Ideas live in your head as abstract thoughts. Engineers, designers, and manufacturers need clarity, structure, and precision. Without that clarity, teams interpret things differently. That leads to misalignment, delays, and costly rework. This stage creates a bridge between vision and execution. A Product Requirements Document gives your idea a concrete form. It explains what the product must do, how it should behave, and what constraints shape it.
A strong PRD removes ambiguity. It aligns everyone around the same understanding. It ensures that every decision moving forward connects back to a clear set of requirements.
PRD Checklist For Hardware Founders
Use this checklist to ensure your PRD stays strong:
- Defined clear product purpose and user
- Documented core features in detail
- Mapped real user scenarios
- Included technical requirements
- Set clear constraints for cost and size
- Defined MVP scope clearly
- Established success criteria
This checklist keeps your requirements structured and complete. It ensures your team moves forward with confidence.
At this stage, your idea transforms into a clear blueprint. Every detail starts making sense. Your team understands what to build and how to approach it. This clarity sets you up for the next stage, where your hardware product finally starts taking shape through design.
Actionable Tip
Turn your PRD into a one page working document that your entire team can reference daily. Start by writing one clear sentence that defines the core problem your product solves. Then list your top three to five features and break each one into simple, measurable requirements. For every feature, define what triggers it, how the user interacts with it, and what outcome it delivers. Add constraints like target cost, size, and performance so decisions stay grounded in reality.

Wildcraft's outdoor gear line required a product strategy anchored in a specific user: someone active, rugged, and value-conscious. Defining that user's behavior and expectations early ensured the product range stayed focused, purposeful, and on-brand rather than sprawling into unnecessary complexity.
MVP Vs Full Product: Features Or Flexibility?
One of the most important decisions in this stage is defining your MVP. Your minimum viable product focuses on delivering core value with minimal complexity. This keeps your development fast and efficient. Start by identifying the one feature that solves the main problem. Everything else becomes secondary. This clarity helps you avoid unnecessary complexity in early stages.
Then outline what the full product could become over time. This gives you a roadmap without overloading your first version. It also helps you plan future iterations based on real user feedback. Balancing MVP and long term vision creates flexibility. You move fast in the beginning while keeping space for growth and improvement.
If you need help in making your first prototype design or minimum viable product, our team of product design experts can help you.

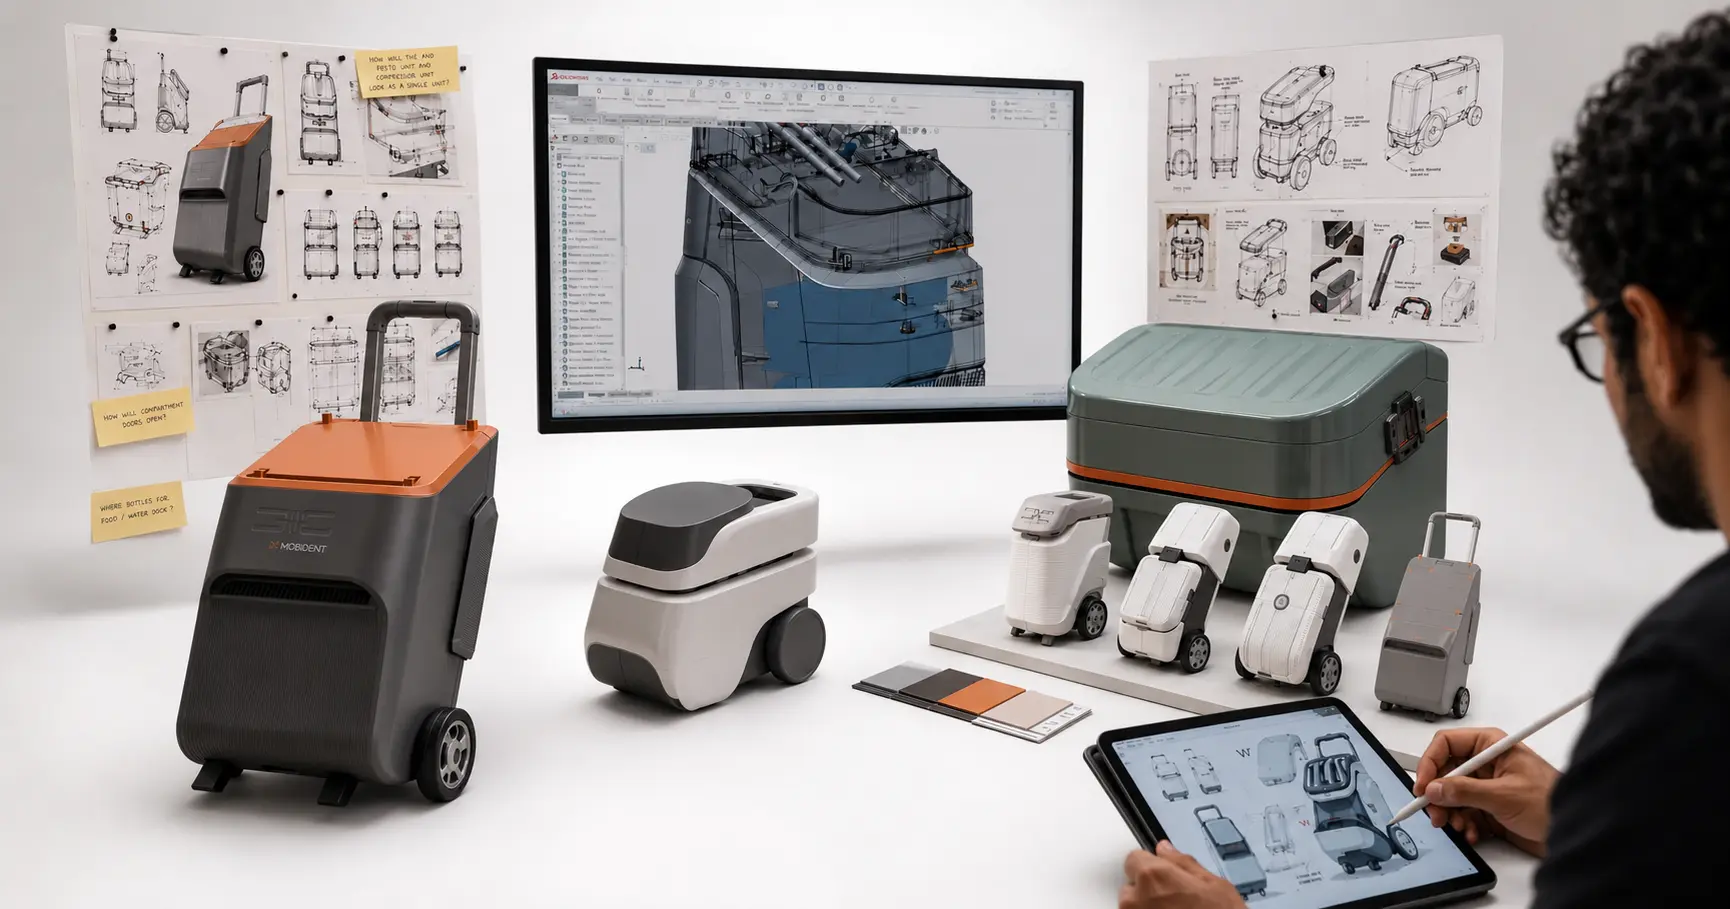
Stage 4: Create Your Concept Design
In the concept design stage, your hardware product starts becoming real. Until now, everything lived in documents, ideas, and structured thinking. Now you begin shaping something people can see, touch, and experience. This shift feels exciting and slightly overwhelming at the same time. Start with sketches. Lots of them. Explore different forms, interfaces, and user experiences. Don't worry about engineering constraints yet, focus on the ideal user experience.
Founders often feel pressure to get the design perfect from the start. That pressure slows down creativity. Concept design works best when you explore freely and test quickly. The goal here is direction, not perfection.
Concept design services help you define how your hardware product looks, feels, and behaves. It influences first impressions, usability, and emotional connection. A strong concept creates trust instantly when a user interacts with your hardware product.
Every decision you make here affects cost, engineering, and manufacturing later. That is why thoughtful exploration at this stage creates long term advantages.
Turn Your Idea Into Something You Can See
Concept design begins with exploration. Start with rough sketches. Draw multiple variations of your hardware product from different angles. Focus on shape, size, and interaction instead of technical feasibility. Sketching allows you to think faster. You can explore ten ideas in the time it takes to build one digital model. This speed helps you discover better directions early in the process.
Move from sketches to simple physical mockups. Use cardboard, foam, or basic 3D prints. These early models help you understand scale and ergonomics in a real world context. When users hold a physical object, their feedback becomes more honest and useful. You start noticing how they grip it, how they react, and how intuitive the experience feels.
Key concept design decisions:
- Form factor: Size, shape, weight constraints
- User interface: Physical controls, displays, feedback
- Materials: Plastic, metal, fabric, glass
- Color and finish: Brand expression and manufacturing cost
- Packaging: Unboxing experience and shipping efficiency
Actionable Tip
Build simple mockups from cardboard, foam, or 3D prints. Put them in users' hands. Watch how they hold it, use it, react to it. Iterate based on real feedback, not assumptions.
Professional industrial design matters here. Poor design decisions made early cost 10x more to fix later. Companies like Google and Panasonic invest heavily in this stage because they understand the math.

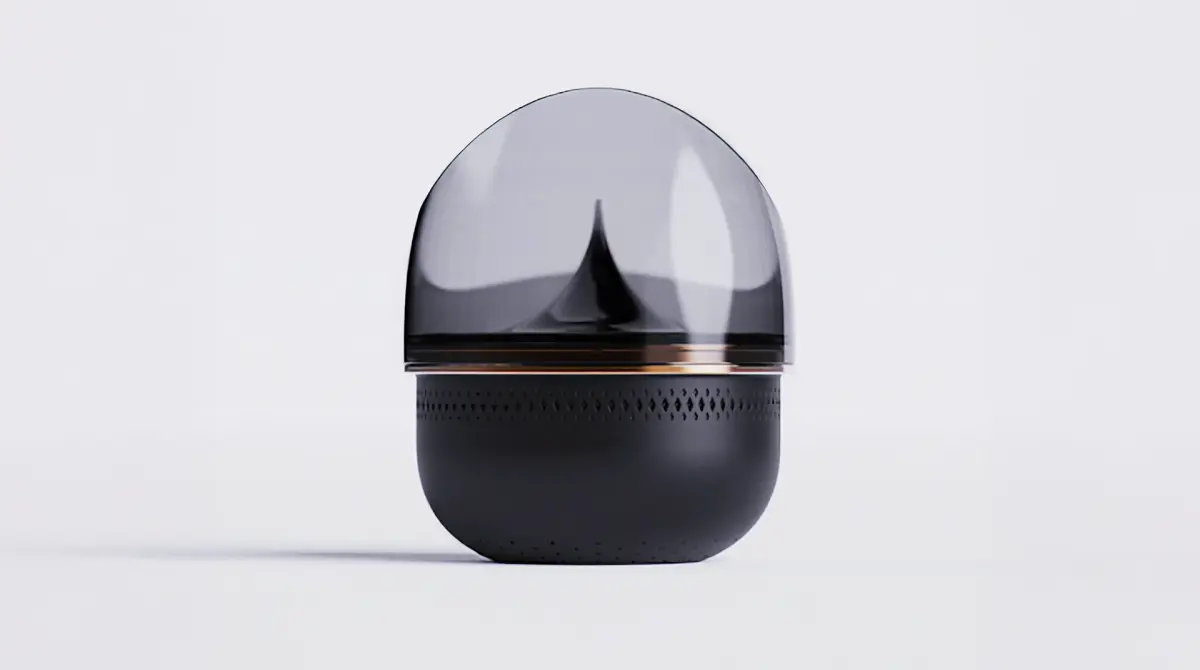
Few categories are as visually competitive as kitchen appliances. For this air fryer, the concept design stage explored shapes, controls, and surface finishes that balanced premium appeal with everyday usability. These decisions directly influence both user perception and production cost.
Concept Design Workflow For Hardware Founder
Follow this structured approach to stay efficient:
- Create multiple rough sketches
- Select three to five strong concepts
- Build basic physical mockups
- Test with real users
- Refine based on feedback
- Develop a more detailed concept
This process keeps your exploration focused. It allows you to move quickly while making informed decisions. At this stage, your product finally takes shape. You move from abstract thinking to tangible design. This clarity sets the foundation for engineering, where your concept transforms into a working product.
Read more about our concept design process and services.
Stage 5: Engineer Your Product
Engineering transforms your concept into something that actually works. This stage determines whether your hardware product can be manufactured at your target price. This is the stage where ideas meet reality. Your concept may look great and feel intuitive, yet now it needs to function reliably in the real world. This shift brings a new level of pressure. Every decision starts carrying technical weight.
Many hardware founders feel overwhelmed here because engineering introduces complexity. Systems, components, electronics, and software all come together. Each part needs to work smoothly with the others. This interconnected nature makes the process feel intense. At the same time, this stage gives your product real power. It transforms design into functionality. It ensures your hardware product delivers on its promise when users interact with it.
A structured engineering approach keeps things clear. It helps you move step by step while reducing risk and confusion.
Actionable Tip
Start with a technical feasibility study. Can the physics work? Are the components available? What are the power requirements? Map out the basic system architecture before diving into detailed design.
Core engineering phases:
- System design: Overall architecture and component selection
- Mechanical design: CAD models, mechanisms, structural analysis
- Electronic design: Circuit boards, sensors, processors, power management
- Software development: Firmware, user interfaces, connectivity
- Integration: Making all systems work together
Engineering moves through a series of clear phases. Each phase builds on the previous one and adds more detail to your hardware product. Each phase adds clarity and depth. Together, they transform your concept into a working system.

Why Design For Manufacturing Starts Here
Design for manufacturing (DFM) starts now, not later. Many hardware founders think about manufacturing later. Yet the smartest teams consider it during engineering itself. This approach is called design for manufacturing. Every design decision affects cost, complexity, and scalability. Reducing part count lowers hardware production cost. Standardizing components simplifies assembly. Designing for volume ensures smoother production later.
Think about how your hardware product will be assembled. Consider how parts fit together, how they are secured, and how quickly they can be produced. These details matter at scale. Early alignment with manufacturing realities prevents expensive redesigns. It keeps your hardware product efficient and scalable.
Work with suppliers early. Component availability and lead times affect your entire timeline. Supply chain disruptions can kill hardware products, so plan for them beforehand.
Common Engineering Mistakes That Slow You Down
- Ignoring system level thinking
- Choosing components without availability checks
- Overcomplicating the design early
- Skipping integration testing
- Delaying manufacturing considerations
Read more: 50 Common DFM Mistakes You Must Avoid
Avoiding these patterns keeps your engineering process efficient. It reduces rework and improves product reliability.
At this stage, your hardware product transforms from a visual concept into a working system. You gain confidence in its functionality and performance. This sets the foundation for the next step, where your product becomes physical through prototyping and testing.
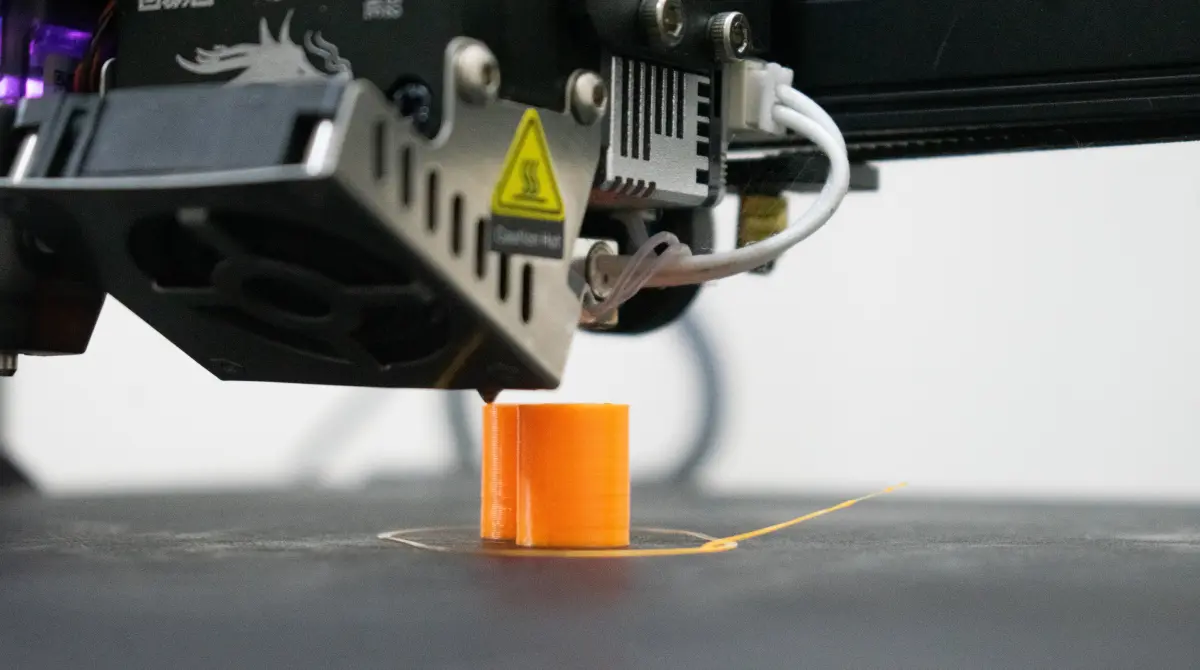
Stage 6: Build And Test Hardware Prototypes
Prototyping turns engineering drawings into physical reality. You'll build multiple generations, each solving different problems. This is the stage where reality gives you honest feedback. Your product exists as a working system, yet it still needs to prove itself in the real world. This brings a mix of excitement and tension. You finally get to see your idea in physical form, and at the same time every flaw becomes visible.
Hardware founders often expect the first prototype to feel close to perfect. What actually happens feels very different. Early versions reveal gaps in usability, durability, and performance. This is where learning accelerates.
Each prototype acts like a conversation with your hardware product. It shows what works, what needs improvement, and what needs to be rethought. This feedback loop becomes your strongest advantage.
The goal of this stage is learning and refinement. Every iteration moves your hardware product closer to something reliable, usable, and ready for production.
Prototype Progression:
- Proof of concept: Does the core technology work?
- Alpha prototype: Basic functionality in rough form
- Beta prototype: Near-final form and function
- Production prototype: Matches final manufacturing specs
Test everything. Drop tests. Temperature cycling. User testing. Regulatory compliance. Accelerated aging. Your hardware product will face conditions you never imagined. Document every failure. Each broken prototype teaches you something about your design. The goal isn't perfect prototypes, it's learning what breaks and fixing it before production.
Budget 20-30% of your development timeline for prototyping. Rushing this stage creates expensive problems later.

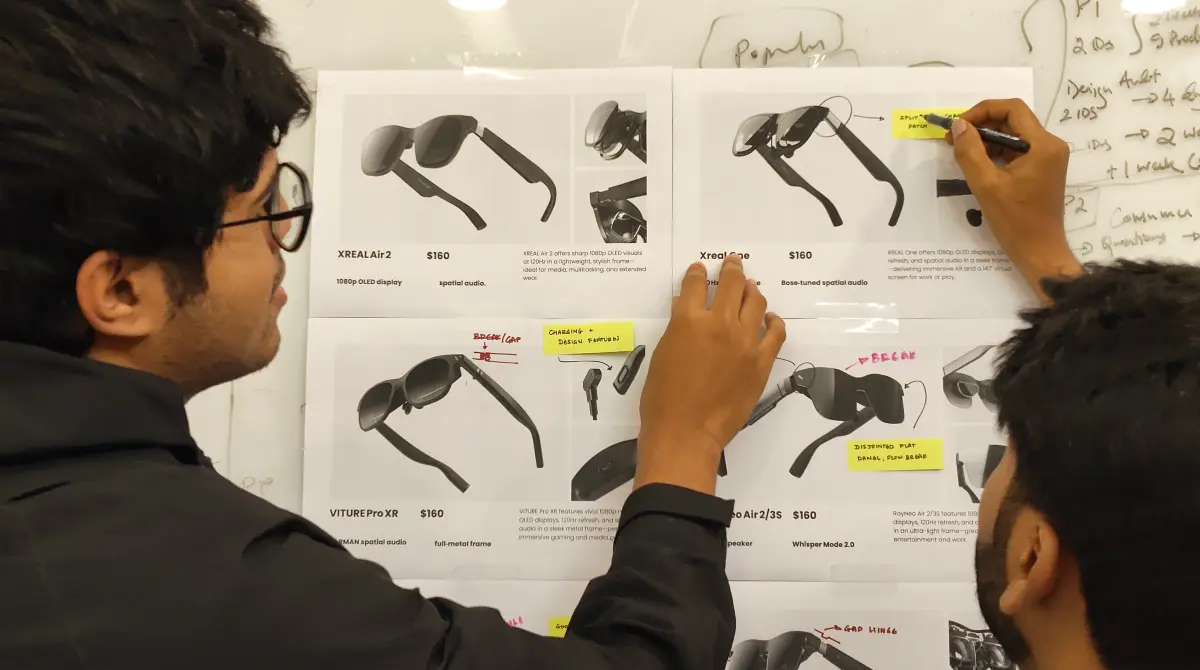
Wearable technology like the Mustard AI glasses goes through more prototype iterations than almost any other product category. Fit, comfort, weight distribution, and electronics integration all needed repeated physical testing before the design could be locked for manufacturing. Each broken or misfit prototype moved the final product closer to something people would actually want to wear all day.
Actionable Tip
A clear testing process keeps your progress efficient. It ensures you capture meaningful insights instead of random observations. Follow this simple approach:
- Define what you want to test
- Build a prototype focused on that goal
- Test with real users and real conditions
- Document every observation
- Identify patterns and key issues
- Refine your design and repeat
This cycle creates continuous improvement. Each iteration strengthens your hardware product. Here’s a step by step guide for hardware product prototyping.
What Do You Learn From Broken Prototypes?
Every failure carries insight. A cracked part reveals material weakness. A loose component highlights assembly issues. A confusing interaction exposes usability gaps. Document these learnings carefully. Patterns begin to emerge as you test more. These patterns guide your improvements and strengthen your design.
Over time, your hardware product becomes more refined. Weak points get resolved. Performance becomes stable. User experience becomes smoother. This stage builds confidence. You begin to trust your product because it has been tested, refined, and improved through real world feedback.
At this stage, your hardware product evolves from a working system into a reliable experience. You gain clarity on what works and what needs improvement. This prepares you for the next step, where you align your product with manufacturing and scale.
Stage 7: Prepare For Manufacturing
Manufacturing preparation determines whether your hardware product ships on time and on budget. This stage changes everything. Until now, your focus stayed on building and refining a working product. Now the focus shifts to producing it at scale. That shift brings a different kind of pressure. Every small decision starts impacting cost, timelines, and quality in a much bigger way.
Get this wrong and your launch fails.
A product that works in prototypes still needs to prove it can be manufactured efficiently. What feels simple in small quantities can become complex at scale. This is where many founders feel uncertainty because manufacturing introduces new variables. At the same time, this stage opens the door to real growth. Your hardware product moves closer to reaching customers in meaningful numbers. The transition from prototype to production marks a major milestone in your journey.
A well planned manufacturing strategy creates stability. It ensures your product reaches the market with consistency, quality, and efficiency.
Key manufacturing decisions:
- Production volume: Determines tooling investment and unit cost
- Manufacturing location: Domestic vs. offshore trade-offs
- Supplier selection: Capability, capacity, quality, reliability
- Quality control: Inspection processes and acceptance criteria
- Packaging design: Protection, branding, cost optimization
Tooling is your biggest upfront cost. Injection molds can cost $50,000-$500,000 depending on complexity. Once you cut steel, design changes become extremely expensive.

Why Tooling Becomes Your Biggest Commitment
Tooling plays a central role in hardware manufacturing. It defines how your product is physically produced. Once tooling is created, changes become expensive and time consuming. Injection molds, for example, require significant investment. Their design must be precise and aligned with your product specifications. This makes early preparation extremely important.
Before finalizing tooling, ensure your design is stable. Test your product thoroughly through prototypes. Validate dimensions, materials, and assembly methods. Tooling represents commitment. When done right, it enables efficient and consistent production. It also reduces long term cost per unit.
Actionable Tip
How will you choose the right manufacturing partner? Your manufacturing partner plays a major role in your success. Their expertise, processes, and communication style directly affect your product quality.
Start by evaluating their experience with similar products. This gives confidence in their ability to handle your requirements. Ask about their production capabilities and past work. Visit the facility if possible. Observing their operations provides valuable insight. You understand how they manage quality, workflow, and timelines.
Strong communication builds trust. A reliable partner keeps you informed, solves problems proactively, and supports your growth. This relationship becomes critical as you scale.
Why Pilot Production Saves You From Costly Surprises
Plan for pilot production. Build 100-500 units using final tooling and processes. This reveals problems you can't see in prototypes. Pilot production acts as a bridge between prototyping and full scale manufacturing. It involves producing a small batch using final tools and processes. This stage reveals real world production challenges.
During pilot runs, you can evaluate assembly efficiency, product quality, and consistency. Small issues become visible before large scale production begins. This stage also allows you to refine packaging and logistics. You understand how your product behaves during handling and shipping. Pilot production builds confidence. It ensures your manufacturing process works smoothly before scaling up.
At this stage, your product becomes ready for scale. You move from development to production thinking. This sets the foundation for certifications, compliance, and a successful market launch.
Stage 8: Navigate Certifications and Compliance
Every hardware product needs regulatory approval. Plan for this early because certifications take months and can require design changes. This phase protects your users and your business. Certifications ensure your product meets safety, performance, and environmental standards. They also build trust with customers, partners, and distributors. A certified product carries credibility that influences buying decisions.
As your product nears completion, a new layer of responsibility appears. Regulations, certifications, and compliance requirements start shaping your path forward. This stage often feels unfamiliar, especially for first time founders. The hardware product works, looks refined, and feels ready, yet approvals still stand between you and the market.
At the same time, this stage introduces timelines, documentation, and testing procedures. Each requirement needs careful planning. Clarity here helps you move forward with confidence instead of uncertainty.
Understanding this process early helps you stay in control. It allows you to prepare, plan, and execute without last minute surprises.
Common Certifications:
- FCC (US): Electromagnetic compatibility and radio frequency
- CE (Europe): Safety, health, environmental protection
- UL/ETL: Product safety testing
- RoHS: Restriction of hazardous substances
- IP ratings: Ingress protection for water and dust
Work with a compliance consultant. They know which tests apply to your hardware product and can guide you through the process. DIY compliance usually creates delays and cost overruns.
Many founders think about certifications near the end. This creates pressure and delays. Planning early integrates compliance into your design and engineering stages. Start by consulting experts who understand regulatory requirements. Their guidance helps you identify necessary tests and documentation. This saves time and reduces risk.
Design your product with compliance in mind. Material choices, component selection, and system behavior should align with standards. This reduces the need for major changes later. Early planning also improves budgeting. Certification processes involve testing fees and documentation costs. Knowing these in advance helps you allocate resources effectively.
Factor certification costs into your budget. Testing can cost $50,000-$200,000 depending on your product complexity and target markets.
At this stage, your hardware product becomes ready for the market from a regulatory perspective. You move closer to launch with confidence. This prepares you for the final stage, where you bring your product to market and scale production successfully.

Medical devices operate under some of the strictest regulatory requirements in hardware. The Mobident mobile dental clinic required compliance planning to begin well before launch, as there would be many design constraints that shaped materials, components, and system behavior throughout hardware product development.
Stage 9: Launch And Scale Production
Launch day isn't the finish line, it's the starting line for your business. Production scaling, quality control, and customer support determine long-term success. Start with a soft launch. Limited quantities to test your entire supply chain under real conditions. Monitor quality metrics obsessively. Fix problems before they reach more customers.
This is the moment everything comes together. Your hardware product is designed, engineered, tested, and approved. Now it needs to reach real customers and perform consistently at scale. This stage feels exciting, intense, and deeply important.
A launch carries expectations. Early users form opinions quickly, and their experience shapes your product’s reputation. At the same time, production needs to stay stable as demand starts building. This balance between demand and delivery defines your success.
Many founders focus heavily on launch marketing. Yet the real challenge lies in execution. Inventory, quality, logistics, and customer experience all need to work together seamlessly. A strong launch builds momentum. A stable production system sustains it. Together, they create a foundation for long term growth.

Hardware Product Launch Readiness Checklist:
- Production line qualified and running
- Quality control processes validated
- Packaging and shipping logistics tested
- Customer support systems ready
- Marketing and sales channels activated
- Inventory management systems operational
The above hardware product launch checklist ensures your launch stays smooth and controlled. A well prepared launch reduces stress and improves customer experience. It ensures every part of your system works together.
Explore how our launch support services help you take your hardware product to market with clarity and confidence.
9 Common Mistakes First-Time Hardware Founders Make
- Overbuilding too early
- Ignoring manufacturability
- Underestimating timelines
- Poor supplier selection
- Scaling production too quickly
- Ignoring early customer feedback
- Weak quality control processes
- Poor coordination between teams
- Inconsistent communication with customers
Your first customers play a powerful role. Their feedback highlights strengths and areas for improvement. Their experience influences future buyers. Engage with them actively. Listen to their insights and observe their behavior. This helps you refine your product and operations.
Positive experiences create strong word of mouth. This organic growth supports your brand and builds credibility in the market.
At this stage, your hardware product becomes a living business. It moves beyond development into real world impact. With the right systems in place, you can scale confidently and build long term success.
The Professional Alternative: Analogy Design
Building a hardware product from scratch feels like a massive commitment. Time, capital, and decisions stack up quickly. Every stage demands precision, and every mistake carries cost. This is where experienced guidance changes the trajectory completely.
A structured, proven process creates clarity. Instead of figuring everything out step by step, you move with direction from day one. This reduces uncertainty and builds momentum across validation, design, engineering, and manufacturing.
At Analogy Design, we've guided hardware products from idea to market launch for companies like Google, Panasonic, and Unilever. Our Product Path™ process structures every stage to reduce risk and avoid the costly mistakes that kill hardware startups. 23 global awards. World-first products shipped. One studio.
Hardware is hard. Our Product Path™ methodology makes it easy.
Work With Hardware Product Design Experts
Working with experts also accelerates timelines. What usually takes months of trial and error becomes a streamlined journey. You gain access to insights, systems, and workflows that have already delivered successful products in the market.
The Product Path™ Launch Program brings clarity to every stage. It covers the complete journey across design, prototyping, manufacturing, and launch. This structured approach reduces risk, improves speed, and ensures your product stays aligned with your goals.
A cross functional team of 24 experts works across industrial design, mechanical engineering, electronics, and product strategy. This integrated approach ensures every detail connects seamlessly, from concept to production.
Real Impact Through Numbers And Results
Numbers tell a powerful story. Over 250 products developed across multiple industries. More than 24 global awards recognizing design and innovation excellence. A decade of experience shaping hardware products that reach real users. Strong partnerships with 150 manufacturing partners create scale and reliability. These numbers reflect consistency, experience, and a commitment to delivering results.
Products built through this process have reached global markets. They have solved real problems, created value, and built strong user connections. This impact reflects the strength of a structured approach.
The Pride Of Building Products That Reach The World
There is a unique pride in seeing your product move from idea to reality. Holding the first production unit, seeing customers use it, and watching it grow in the market creates a powerful sense of achievement. With the right process and guidance, this journey becomes smoother and more rewarding. Each stage feels purposeful. Each decision builds toward a clear outcome.
Analogy Design stands as a partner in that journey. A team that understands the complexity of hardware and brings clarity through experience. A studio that transforms ideas into products that reach shelves, users, and global markets.
Hardware carries complexity, ambition, and impact. With the right approach, it becomes a journey defined by precision, confidence, and pride.
Tools & Resources for Hardware Startups
Many founders spend weeks exploring options, comparing features, and switching platforms mid process. This slows progress and drains energy. Clarity comes from understanding what each tool actually helps you achieve. Some tools support design, others help you prototype, and some connect you with manufacturing. Each plays a role at a specific stage of your journey.
The right tools create momentum. The wrong tools create friction.
Instead of chasing every new platform, focus on a simple stack that supports your workflow. Tools should help you move faster, test ideas quickly, and collaborate smoothly with your team. A focused approach saves time. It also helps you stay consistent as your product evolves from concept to production.
Start with the following tools:
- SolidWorks
Industry standard CAD tool for precise 3D product design and engineering. - Fusion 360
Cloud based CAD tool combining design, simulation, and manufacturing. - Creo
Advanced CAD software used for complex product design and engineering. - Blender
Free 3D modeling tool for concept design and visual exploration. - KeyShot
Real time rendering tool for creating high quality product visuals. - Tinkercad
Beginner friendly tool for quick prototyping and simple 3D models. - Xometry
Platform for rapid prototyping and custom manufacturing services. - Protolabs
Fast production service for prototypes and low volume parts. - Alibaba
Marketplace to find manufacturers, suppliers, and components globally. - HAX Accelerator
Hardware focused accelerator offering funding, mentorship, and support. - 50 DFM Tools
In this blog post, we have shared 50 DFM tools, software, and techniques.
Frequently Asked Questions About Hardware Product Launch
Q1: How long does it take to build a hardware product from scratch?
Most first-time hardware founders underestimate the timeline significantly. A realistic hardware product development timeline runs between 18 and 36 months from initial idea to market launch. The exact duration depends on product complexity, number of prototype iterations, certification requirements, and manufacturing readiness. Simple consumer products with minimal electronics can move faster, while connected devices or medical hardware tend to take longer due to regulatory approvals. The biggest time losses happen in two places: jumping into design before validating the idea, and discovering manufacturing problems too late in the process.
Founders who follow a structured hardware product development process and align design with manufacturing from the beginning consistently reach launch faster than those who figure it out stage by stage.
Q2: How much does it cost to develop a hardware product from idea to launch?
Hardware product development costs vary widely based on complexity, but most first-time founders should budget between $100,000 and $1,000,000 from concept to initial production run. Early stage costs cover industrial design, mechanical and electronic engineering, and prototyping. Mid stage costs include tooling, which can range from $50,000 to $500,000 depending on part count and complexity. Certification testing adds another $50,000 to $200,000 depending on target markets.
Building a detailed cost model at the product requirements stage helps you stay in control of your hardware product development budget before costs compound across later stages.
The most common mistake founders make is budgeting only for design and prototyping while underestimating tooling, compliance, and supply chain setup.
Q3: What is the biggest mistake first-time hardware founders make when launching a product?
The single most damaging mistake is scaling production before the product is truly ready. Many first-time hardware founders rush from prototype to large production runs because of investor pressure or early customer demand. When the product reaches customers at scale with unresolved quality issues, the cost of returns, replacements, and reputation damage far exceeds what a proper pilot production run would have cost.
A controlled pilot of 100 to 500 units using final tooling and processes reveals assembly problems, component failures, and packaging gaps before they become expensive at volume. Founders who invest in this step consistently report smoother full scale launches and stronger early customer satisfaction.
Getting to market fast matters, but getting to market right matters more.
Final Thoughts: From Idea to Shelf
Hardware development takes time, effort, and resources. Timelines often stretch as you refine your product. Iterations bring improvements, and each iteration adds learning. Costs evolve as your product matures. Early estimates become more accurate as you move closer to production. Planning with flexibility helps you stay prepared.
Challenges appear at every stage. Technical issues, supply chain delays, and user feedback all shape your journey. Handling these challenges with a structured approach keeps you moving forward. Understanding these realities builds resilience. It helps you stay focused and committed to your goal.
7 Key Takeaways That Shape Successful Hardware Products
- Start with strong validation before building
- Keep your product focused and simple
- Define clear requirements early
- Test and iterate through prototypes
- Align design with manufacturing from the beginning
- Plan for certifications and compliance
- Launch with controlled scaling
These principles create a strong foundation. They guide your decisions across every stage of development.
Join A Community Of Hardware Founders
Build alongside people who are on the same journey as you. First time hardware founders, builders, and operators who understand the challenges, decisions, and pressure that come with turning an idea into a real product. This community creates a space where you learn faster, share openly, and move forward with clarity.
You can gain perspective from real founders with real experiences.
Founders share what worked, what improved their process, and how they moved through critical stages like validation, prototyping, and manufacturing. These shared insights help you make stronger decisions and avoid common setbacks.
Progress becomes easier when you are part of a group that is building with intent. Conversations lead to clarity, feedback sharpens your thinking, and consistent action becomes part of your routine. Momentum builds when you see others moving forward and contributing to the same goal.
Your idea deserves to exist in the real world. With the right people around you, the journey becomes more structured, more focused, and far more powerful.
Join an exclusive community of builders and founders including founders who have already worked and launched with Analogy. Apply here: https://forms.gle/NL3ZckWosECAgjWp9
Your Next Step
Building a hardware product from scratch is possible, but success requires discipline, expertise, and often more capital than founders initially budget. Every stage matters. Every decision compounds. You have two paths: learn by making expensive mistakes, or work with experts who've already made them.
Focus on progress instead of perfection. Build, test, learn, and refine. This approach keeps your journey dynamic and effective. Keep moving forward, and your idea will transform into something real, valuable, and impactful.
Your next step starts with action. Begin today, stay consistent, and watch your idea evolve into something powerful and real.
Ready to turn your hardware idea into a market-ready product? Learn more at www.analogydesign.co.
About The Author

Vyasateja Rao - Founder, Analogy
Vyasateja Rao is a multi-award-winning product designer with over two decades of experience, and the visionary founder of Analogy, a Bangalore-based industrial and interaction design studio. He specializes in crafting memorable and innovative experiences for both physical and digital products. After earning a Masters in Industrial Design from North Carolina State University in 2007, Vyasateja worked across the United States, Hong Kong, China, Korea, Taiwan, Singapore, and India, collaborating with Fortune 500 companies and leading design studios. His studio has received international recognition, including the Red Dot, IBDC, Singapore Design Award, and multiple patents for product innovation. Vyasateja has designed for global clients such as Panasonic, Unilever, Amazon, Marvel, and Cellairis, blending creativity with manufacturability to create breakthrough products. Beyond design, he mentors aspiring designers, teaching the importance of contrast, surprise, and hidden artifacts in creating compelling experiences.